
Dealing With Tile Lippage & How to Prevent Lippage When Laying Tile
This site utilizes Google Analytics, Google AdSense, as well as participates in affiliate partnerships with various companies including Amazon. Please view the privacy policy for more details.
For the master bathroom remodel, my wife chose a 12” x 24” tile. Unlike a standard square 12” x 12” tile, I felt that having the tiles aligned such that they go “straight up” will look a bit off and that they’d appear better offset.
Initially, I planned to have the tiles at a 50% offset. However, when I bought the tile, the packaging had a warning saying not to install at a 50% offset, but rather offset anywhere from 15% to 30%:
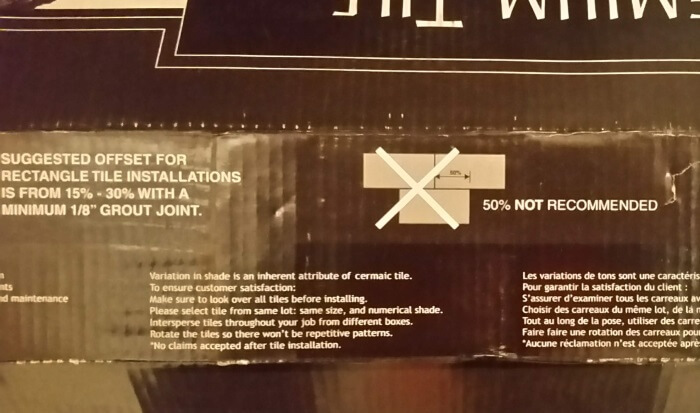 The warning on the box.
I didn’t completely understand why a 50% offset could be bad at first, so I started doing some research. It turns out that, despite the manufacturer’s best effort, tiles are domed somewhat. For my 12” x 24” tiles, the center of the 24” axis is higher than the edges. This means a 50% offset matches that high point in the center with the low point on the edges:
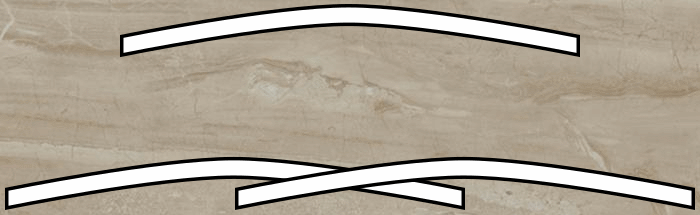 Example side image of the issue.
This “high point matching with the low point” results in something called tile lippage which is where tiles are not or don’t appear to be laid at a uniform level. To see a really bad example (or a good example?) of tile lippage, check out the article Managing Lippage: Why Offsets Matter When Installing Tile.
Generally, there are two things to reduce the appearance of and help avoid lippage when installing tile:
- Avoid offsetting more than a third, or 33%.
- Avoid having to narrow a grout joint - no less than an eighth of an inch (1/8”)
For number two, you can visualize how having a narrow grout line could exacerbate lippage: imaging no grout line. Conversely, imagine a foot wide grout joint - ridiculous, of course, but it would be nearly impossible to tell if there was any lippage.
After I began installing the tile, I realized that the offset wasn’t going to be enough to help with the tile lippage. I needed a better way to prevent lippage when laying tiles.
Enter QEP’s LASH Tile Leveling System. Well, LASH stands for Level, Align, Space & Hold so saying it’s a “Leveling” system is redundant, but it works.
To show you how it works, here’s a YouTube created by QEP:
Here are a couple images of the LASH clips and wedges installed in the master bathroom:
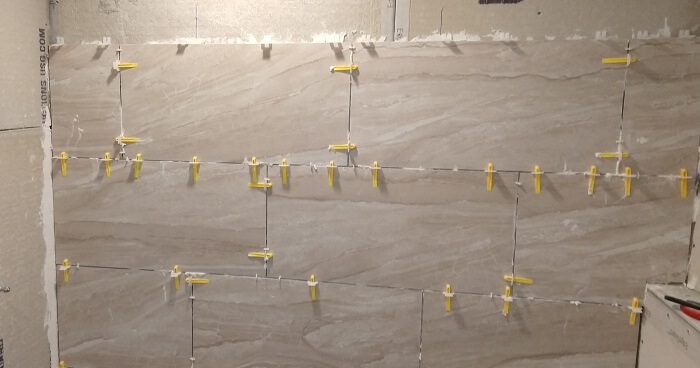 The LASH clips and wedges.
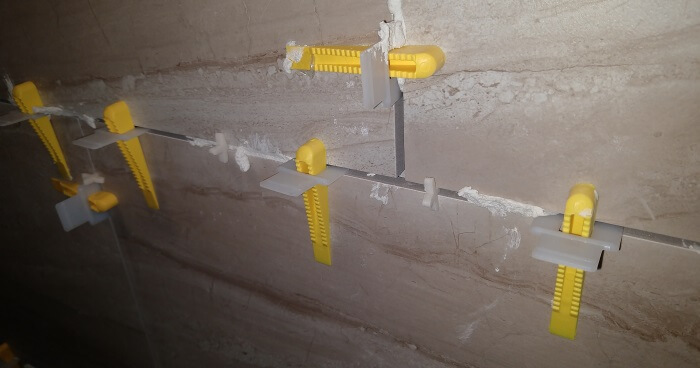 Close up of the LASH clips and wedges.
I haven’t been able to find the flat LASH clips on Amazon, but they are available at Home Depot.
I was able to find the curved LASH clips - which are intended for installing tiles that are different thicknesses - on Amazon. The wedges are on Amazon as well.
Right now, at the time of this writing, everything - the clips, the wedges, and the pliers - are cheaper at Home Depot than on Amazon. About five bucks cheaper, so I’d only suggest Amazon if you have a gift card to burn or if for some reason Home Depot isn’t available in your area.
Then again, you’re probably not reading this while I’m writing, so the prices have probably changed. Maybe Amazon ended up being cheaper than Home Depot, so be sure to price compare if you want to get the best deal.
Home Depot Links:
- Flat LASH Clips (96 per Pack)
- Curved LASH Clips (96 per Pack)
- LASH Wedges aka “Part B” (96 per Pack)
- LASH System Pro Pliers
Amazon Links:
Oh, and I didn’t need to use the special LASH pliers - my fingers were strong enough to push the wedges into the clips. Maybe with the pliers, I could’ve pushed the wedges further into the clips, resulting in a flatter installation, or maybe I would’ve just broken the clips. They would probably be beneficial for professionals in order to help prevent hand fatigue and cramping, though.
1 comment for Dealing With Tile Lippage & How to Prevent Lippage When Laying Tile
Leave a Reply

Thanks for writing this, you saved me a ton of headaches!
Reply to This Thread